Before starting any repairs always shut off the breaker to the appliance.
If your oven is electric and is slow to heat, will not heat up at all, cannot maintain temperature the oven heating element may be the problem. Most ovens have just two heating elements.
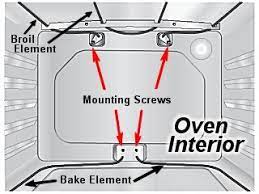
First locate the oven heating element. The broil element is usually located near the top of the oven. The Bake element is usually located on the bottom.

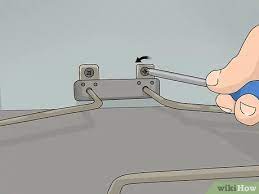
The element is usually held in with 2 screws. Remove these screws. Be sure to apply pressure to the driver when removing, these are sometimes corroded and strip out easily. Then carefully pull the element forward with the wires still attached to the element. Use a cloth or gloves to prevent contaminating the heating element when touching the element. Next disconnect the wires. Use needle nose pliers to grab hold of the wire terminal and carefully remove.

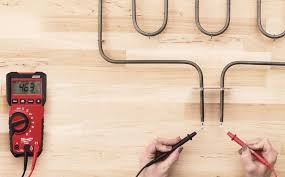
Now you can remove the element and test it. Connect your multimeter. Set to ohms on the 1x scale. Connect one lead to each terminal of the heating element. You should have a reading of between 15-120 ohms on most ovens. You can consult your tech sheet for the exact range. The tech sheet is usually taped to the back of the range in a packet. If it fails, you will need to replace the heating element. Next while you have it and your multimeter set for ohms on the 1x scale you can check it for shorts. To do this connect one lead to the outside of the element. Connect the other lead to each terminal of the heating element one at a time. You should have no reading on either terminal. Any reading indicates a short and you will need to replace the heating element.

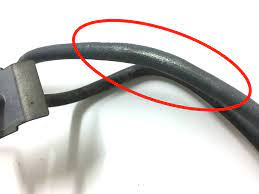
One final check is a close inspection for burn marks or broken pieces of the coating. To replace the heating element. Connect the wires. Then align the element back into position aligning the screw holes. Install the screws. Turn power back on and check.
